How to build a SaaS in a weekend
Have an idea? Want to get an MVP out quickly? Using existing tools we will build a fully-functioning SaaS in a single weekend! Keep reading to learn how.

You might think the development of the software is the difficult part, but I’m here to put that in perspective. There are tons of templates and tools to automate a lot of the development of a standard SaaS (Software as a Service), which allows you to skip (or speed-through) a lot of steps and still deliver a quality product for your customers. Using existing tools will allow you time to focus on building out the business logic, the part that separates you from your competition, and iterate faster, testing new ideas and getting to profitability much quicker. Last but not least, you will have time to do marketing!
As a proof of concept, I have built a fully-functional SaaS in a single weekend, and in this article I am going to show you how. Feel free to copy everything you see here and create a SaaS of your own. Let’s begin.
This article contains a few affiliate links (what is it?) for products that I use and recommend. These are no extra cost for you, but will give me a small cut if you decide to purchase from them. Thank you for your support!
What does a SaaS need?
First, let’s address what we need to achieve in terms of product. Customers of your SaaS have certain expectations, and if you don’t address some of them - you might not have a usable product. Here’s what a typical SaaS needs to get started:
- Business logic - first and foremost, you need a feature to sell - whether it’s API access, an automation, report generation, a fully-fledged platform for agencies, or some other feature that provides value to your customer.
- Authentication - ability to sign up, log in, reset password, perhaps even two-factor authentication for extra security.
- Billing - ability to enter payment details, charge money, and create/display invoices.
- Documentation - your customers need to know how to use your product. Even the most well-thought software needs a help center or API documentation for your customers to get unstuck and get the most value from your product.
- Landing page - your customers need a place to get a first impression and learn about your product before signing up. You will share this page across all of your marketing efforts later.
- Hosting - finally, your business needs to be available to the public. Once you’re done building it locally, let’s put it to the cloud!
I think the above list is a great starting point for a SaaS, and will be perfectly usable for your customers, and all of the above can be built or set up in a single weekend!
The Tech Stack
In order to move fast, you need to use a framework. You also need to be knowledgable and feel comfortable with it. If you want to iterate fast, that is not the time to try out a new framework or a language. Pick whatever works for you best, whether that’s Laravel, Ruby on Rails, Django, Symfony, or some other framework that you’re familiar with.
In my case, I feel very comfortable with Laravel, which also happens to have dozens of helpful tools to save time and make building your SaaS much easier. For those reasons, I will be using Laravel in this article.
Now let’s move to the steps required to build a fully functional SaaS.
1. Authentication
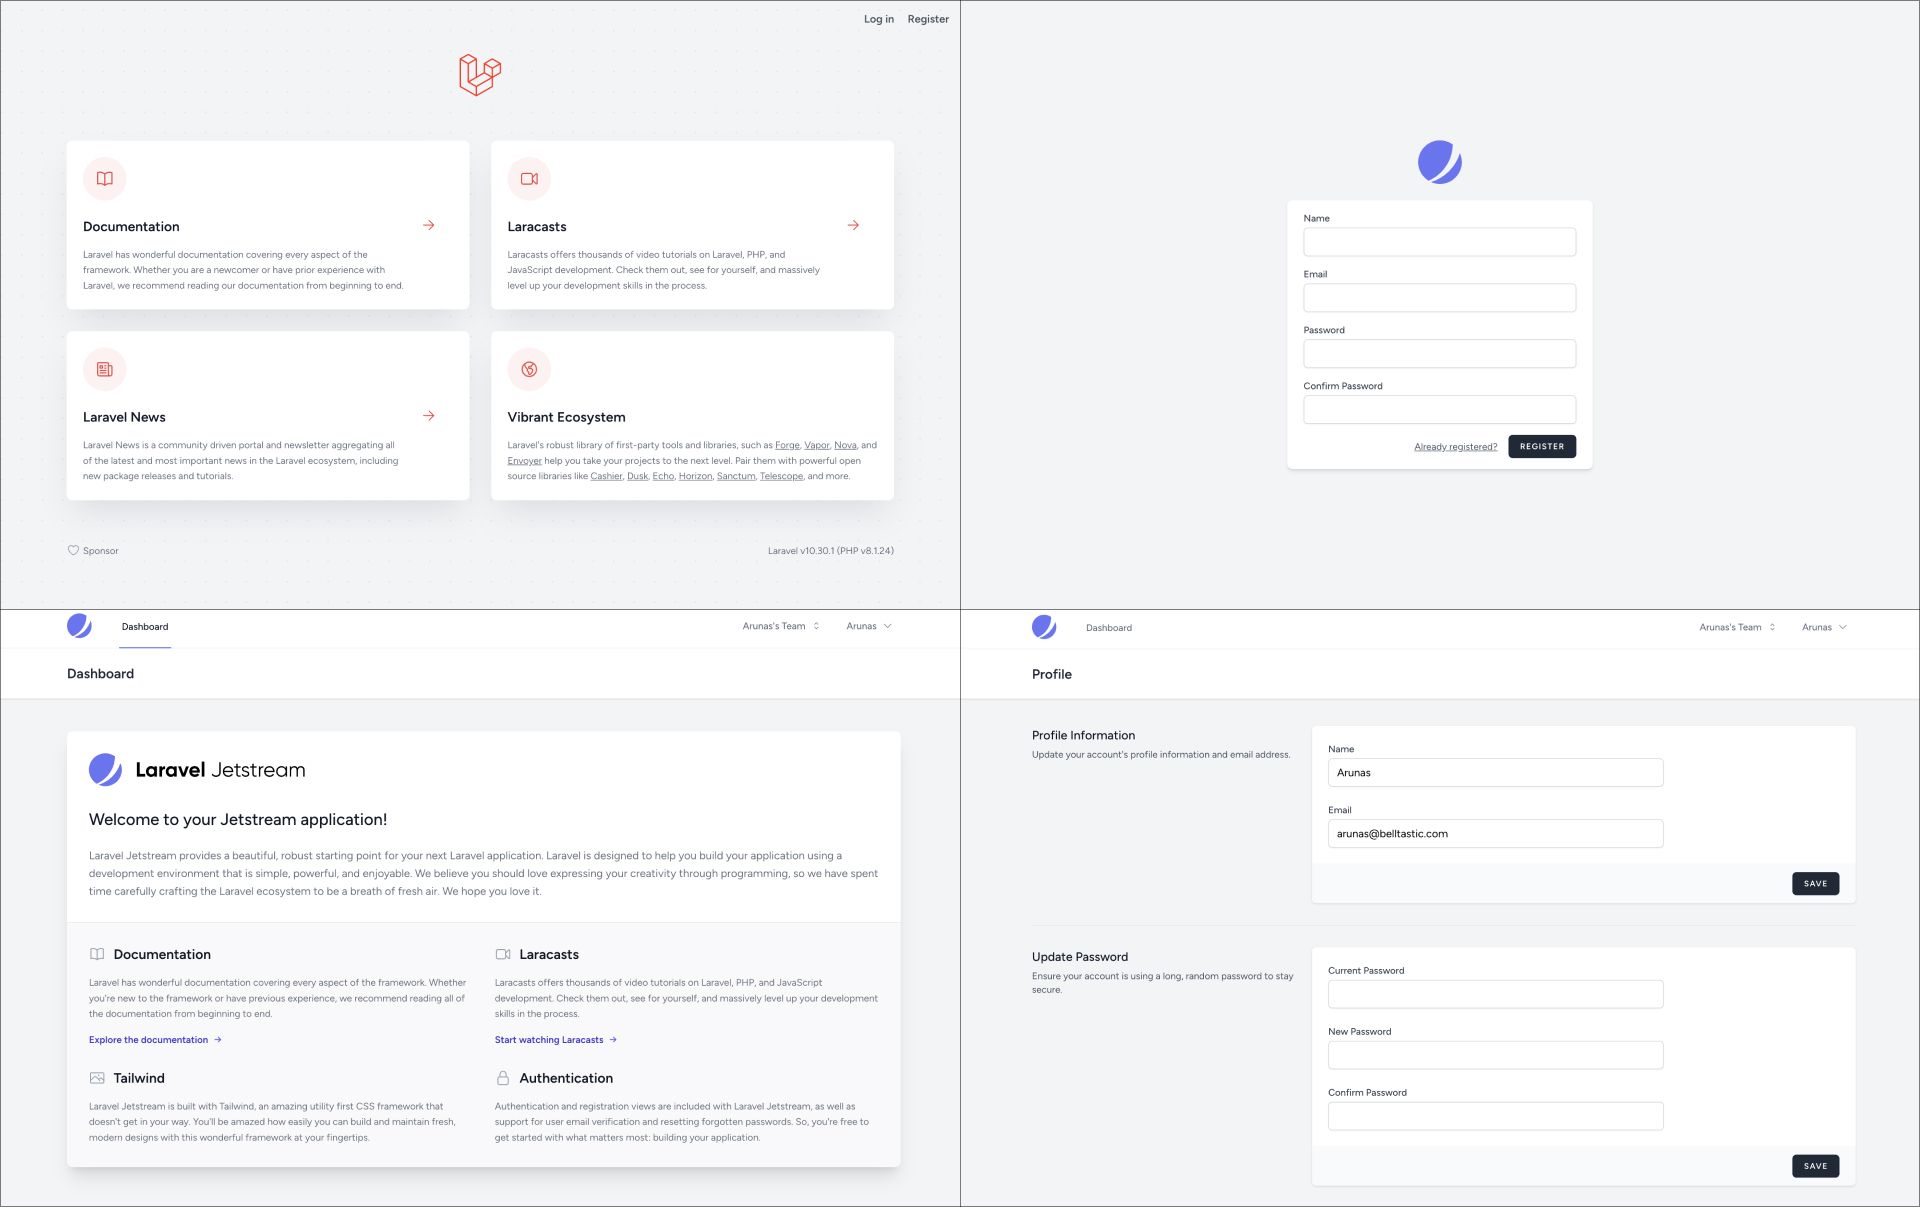
Many web frameworks these have scaffolding for authentication out of the box. Laravel is no exception. Let’s build the app skeleton with authentication.
There are a plethora of other options available in Laravel scaffolding, including the type of frontend (or none) you’d like to use, whether to include teams functionality, dark mode, and more. You can view Laravel’s available options by running this command:
$ laravel help new
Being familiar with the framework and the available tools, I know precisely the options I need for this project. Let’s create our app:
$ laravel new --jet --stack=livewire --dark --teams my_app
The above will do the following:
- Create a new Laravel application
- Include the Jetstream starter kit, specifically the Livewire version. This will include
- Authentication
- Password resets
- Email templates for all authentication-related actions
- Two-factor authentication
- Include the dark mode capability
- Include the teams capability
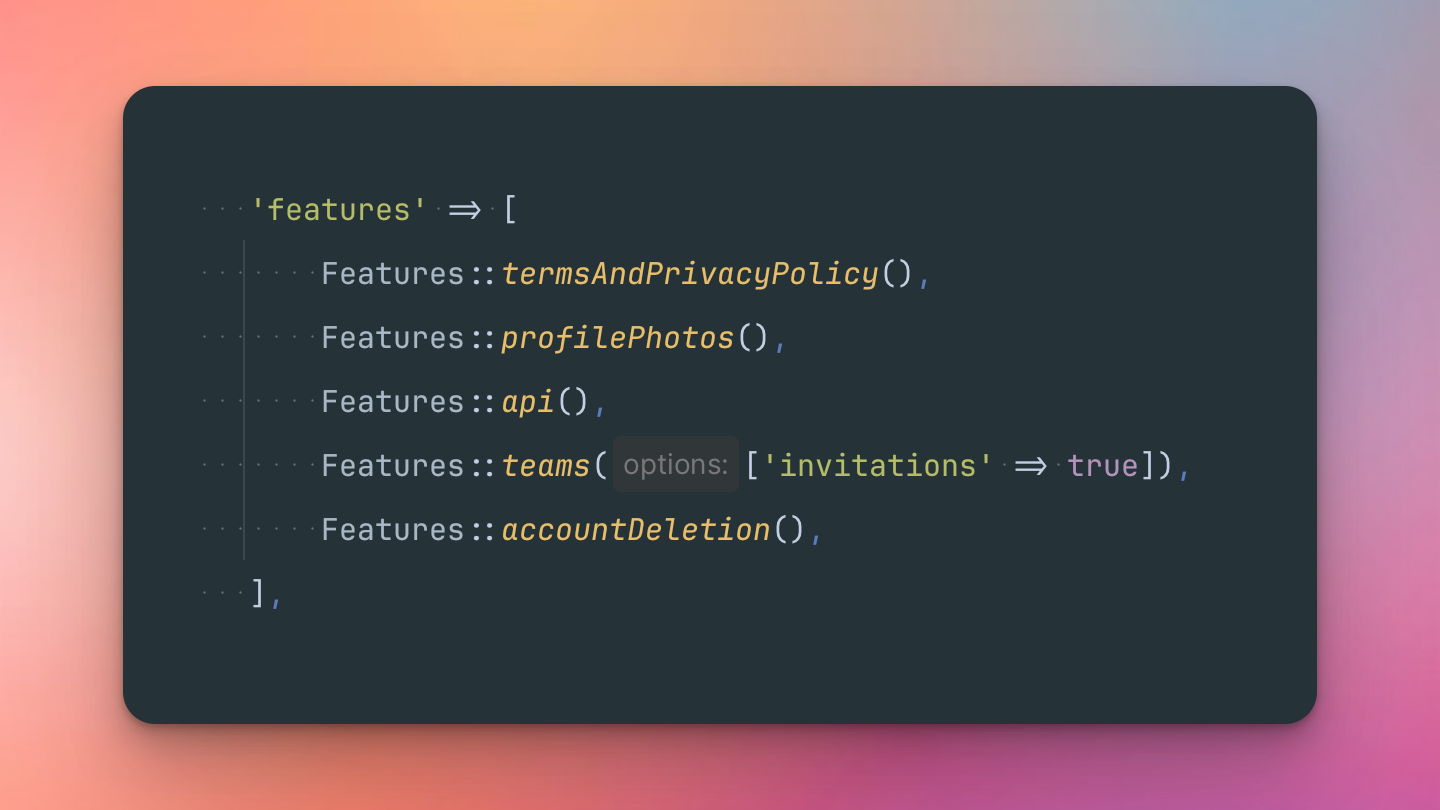
The Jetstream starter kit has a lot of account management features built in already. A single line configuration change later will also allow your users to update their profile photos, or even create and manage API tokens.
All of the above is generated in less than a minute. How neat is that?
2. Business logic
Now that you have an app that users can log in to, you might want to start on your business logic. After all, that is the most important part, the moat, the feature that your customers will pay for. Because of it’s importance, you should focus on that first. Get the hard parts out of the way, and you can then apply the finishing touches (billing, documentation, landing page) later.
In my case, I chose to build an IP geolocation API service. Mostly because of how easy it was to implement it for this example :)
I have created an /api/v1/ip/{ip} endpoint which returns location data about a given IP address. The code for it is pretty simple:
class IpController extends Controller
{
    public function __invoke(IpRequest $request, string $ip, IpService $ipService)
    {
        try {
            return $ipService->getIpInfo($ip);

        } catch (AddressNotFoundException $exception) {
            Log::warning($exception);
            abort(Response::HTTP_NOT_FOUND, 'IP data not found.');
        }
    }
}
The above is for example purposes only. Your own business logic will look different, based on the feature you’re working on.
If you’re wondering where I get my IP data - I use one of MaxMind’s downloadable databases. There are libraries for every language to efficiently read these databases and get the most basic information about an IP address. Create an account, download the database, and follow their documentation on how to integrate it with PHP or other language of your choice.
3. Billing
After you have built the feature your customers will use, you will begin thinking of how to charge for that feature, and how much. How much to charge - that is a complex topic outside of this article, and I’ll leave that up to you. For this project, though, I chose to bill per IP lookup, and to offer customers the ability to subscribe for a number of lookups per month, or to purchase a bundle of lookups that they can use any time they want.
Building a billing portal or any subscription logic from scratch is difficult and time-consuming, especially because every business’s pricing structure is nuanced. Luckily, there are a few options to choose that help you set it up in a matter of hours or even minutes. Here’s a couple of them:
Both of the above options are paid, but they do a lot of heavy lifting and save you lots of valuable time, which makes them definitely worth the price.
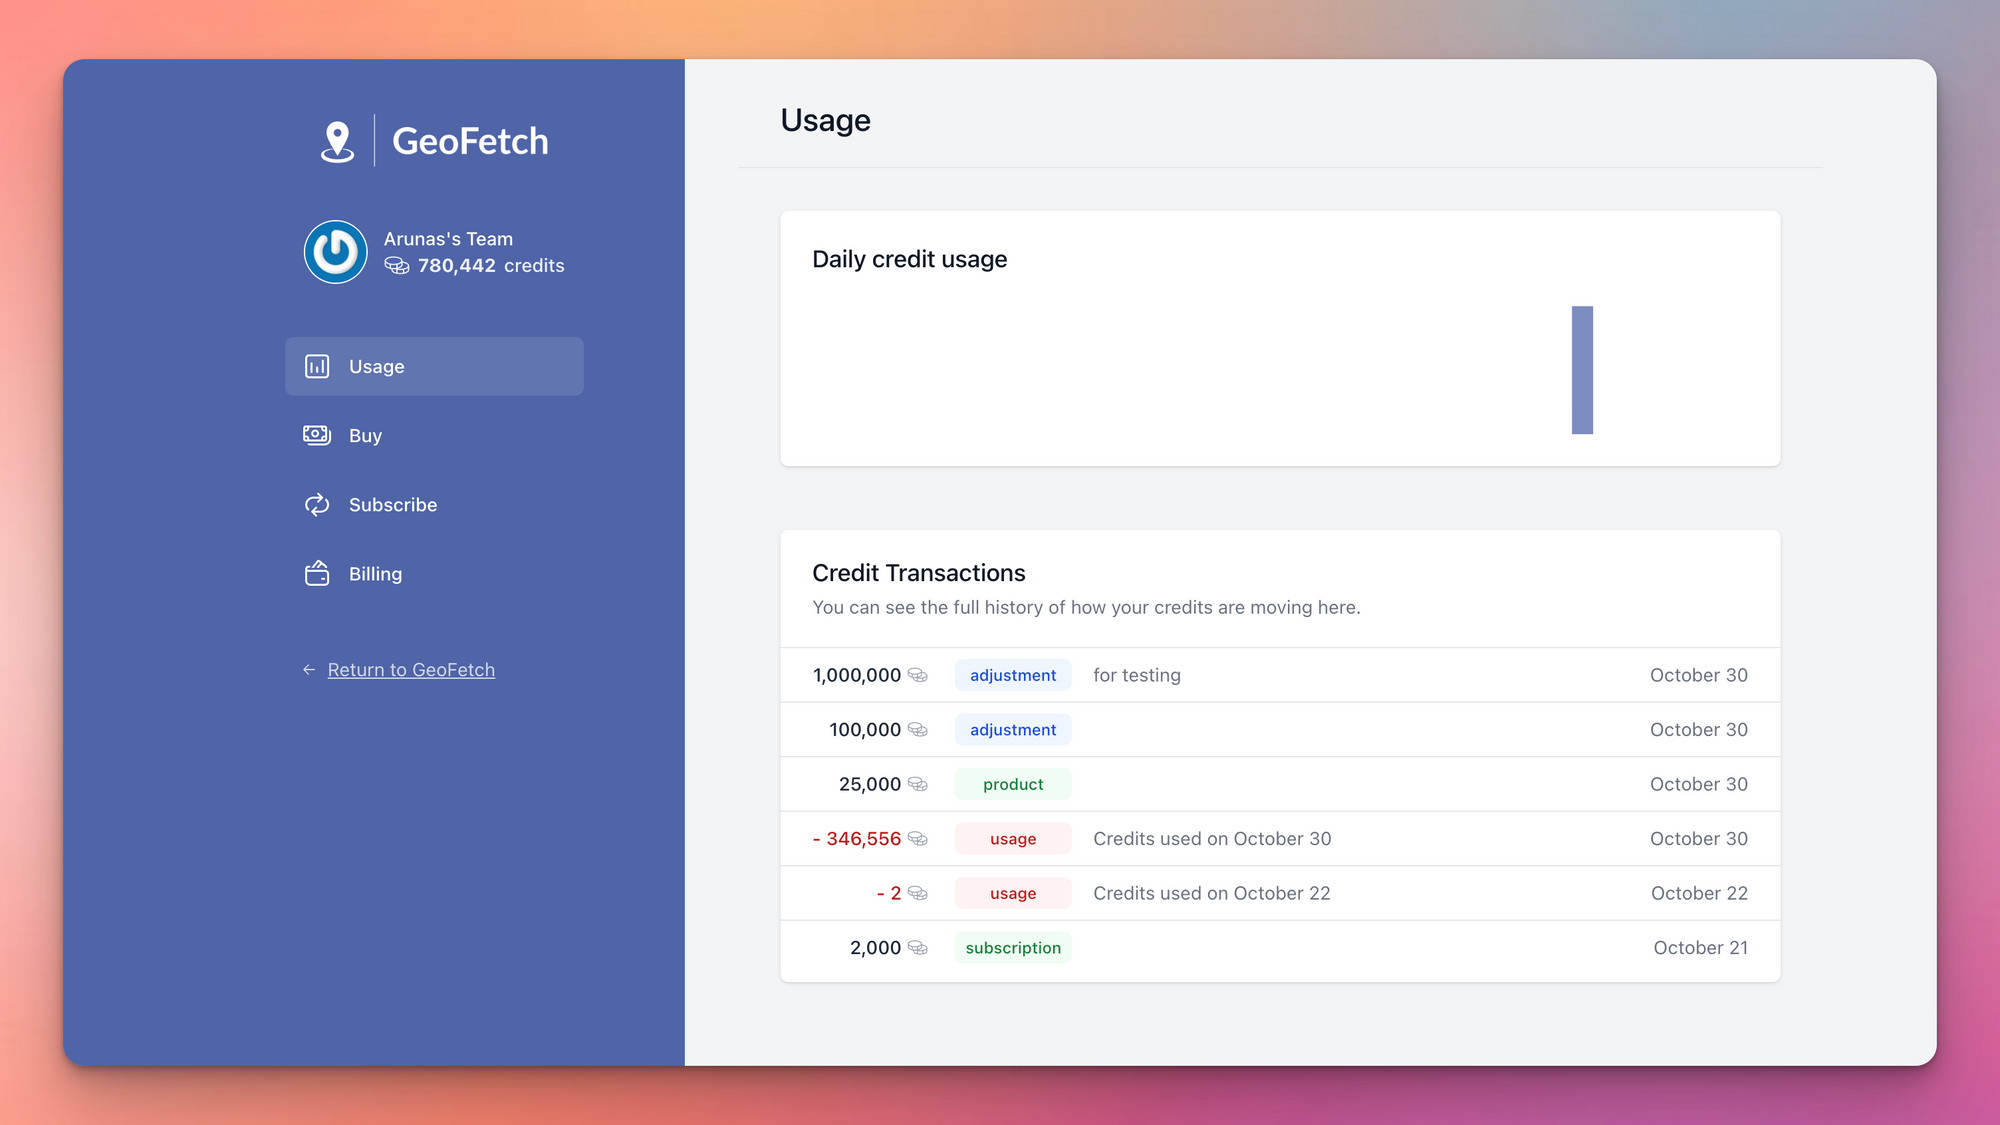
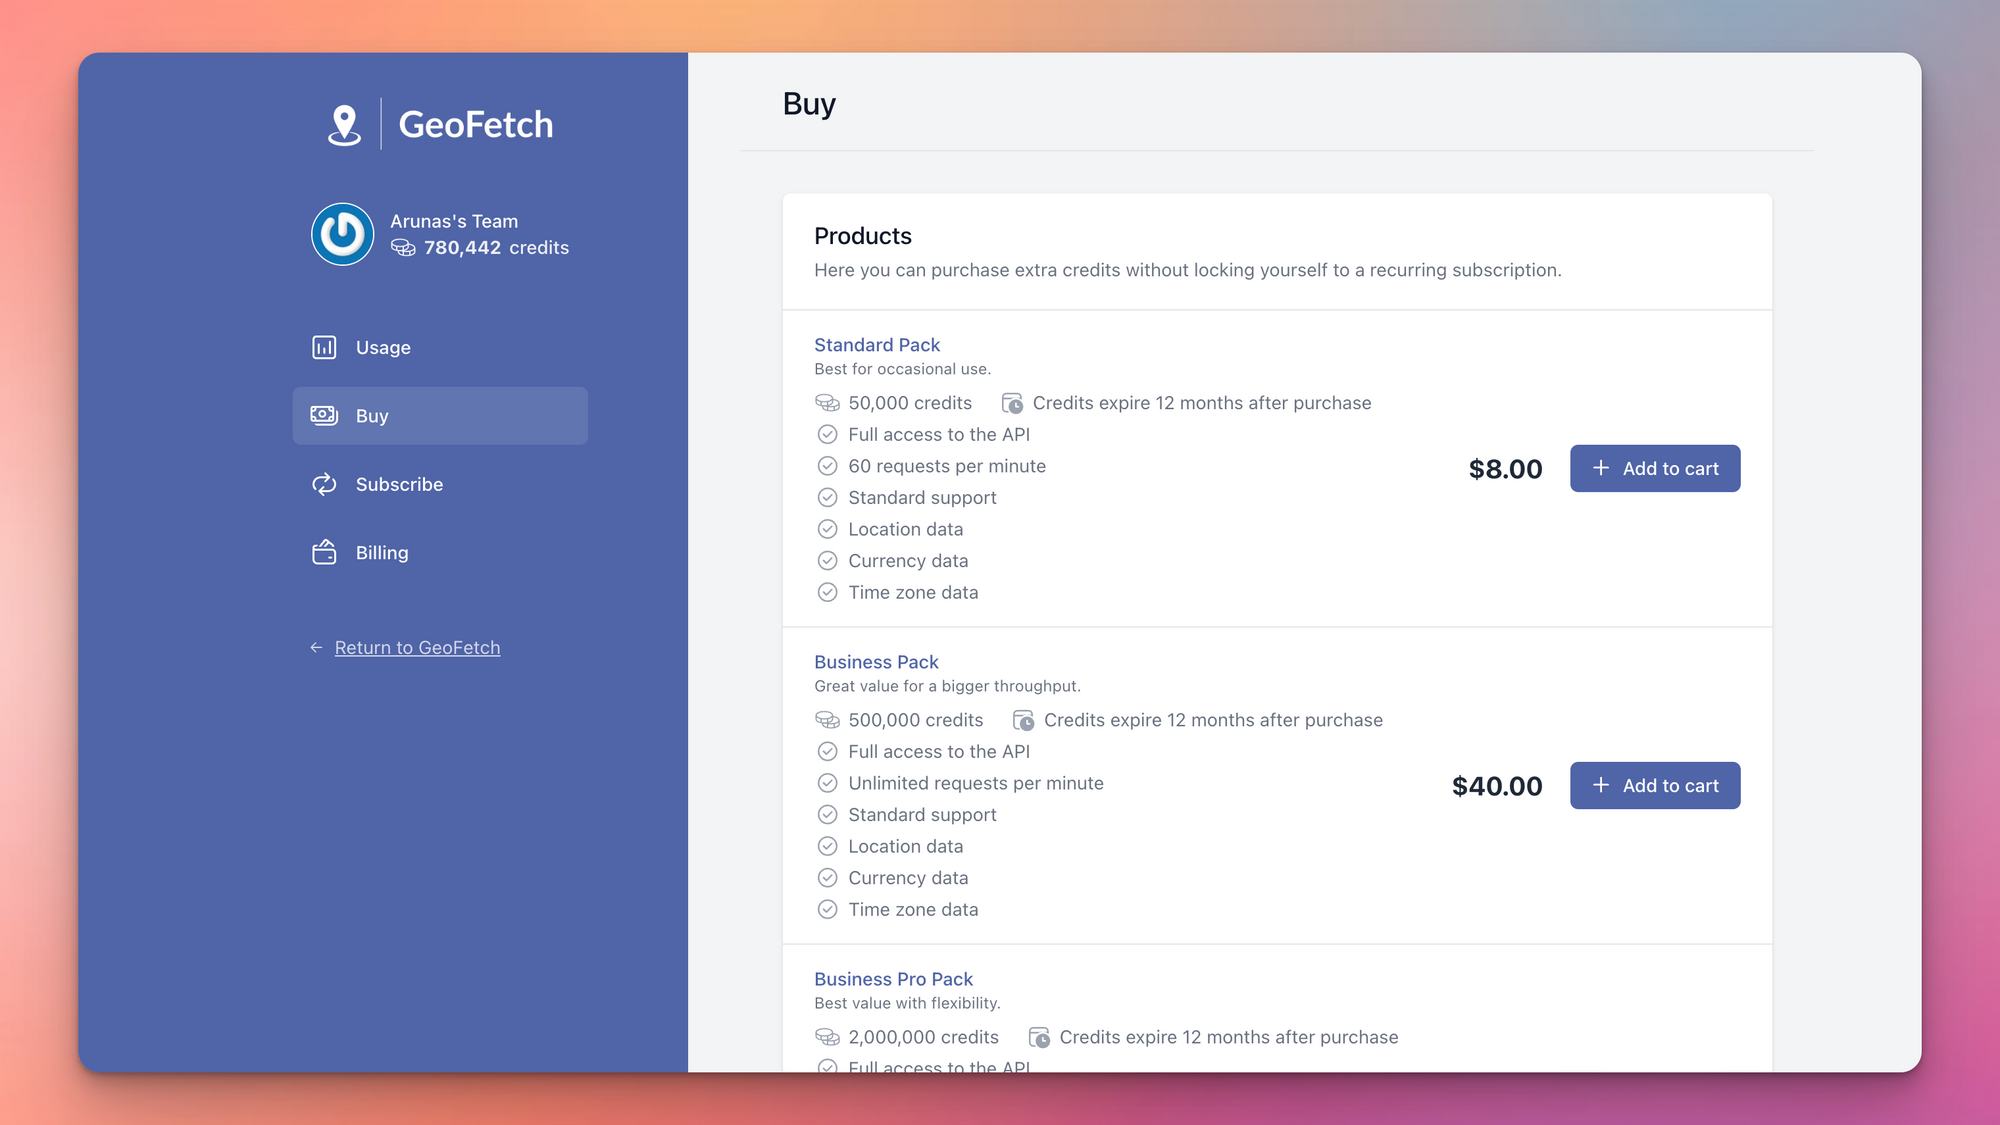
Because I am building an API, and I’d like to sell API credits, the second option Spike was the perfect choice because of its native credits support. Customers will be able to buy credits and consume them with API calls. It even contains a chart of credit usage. Let’s set it up by following the instructions on Spike’s Installation page - https://spike.opcodes.io/docs/install
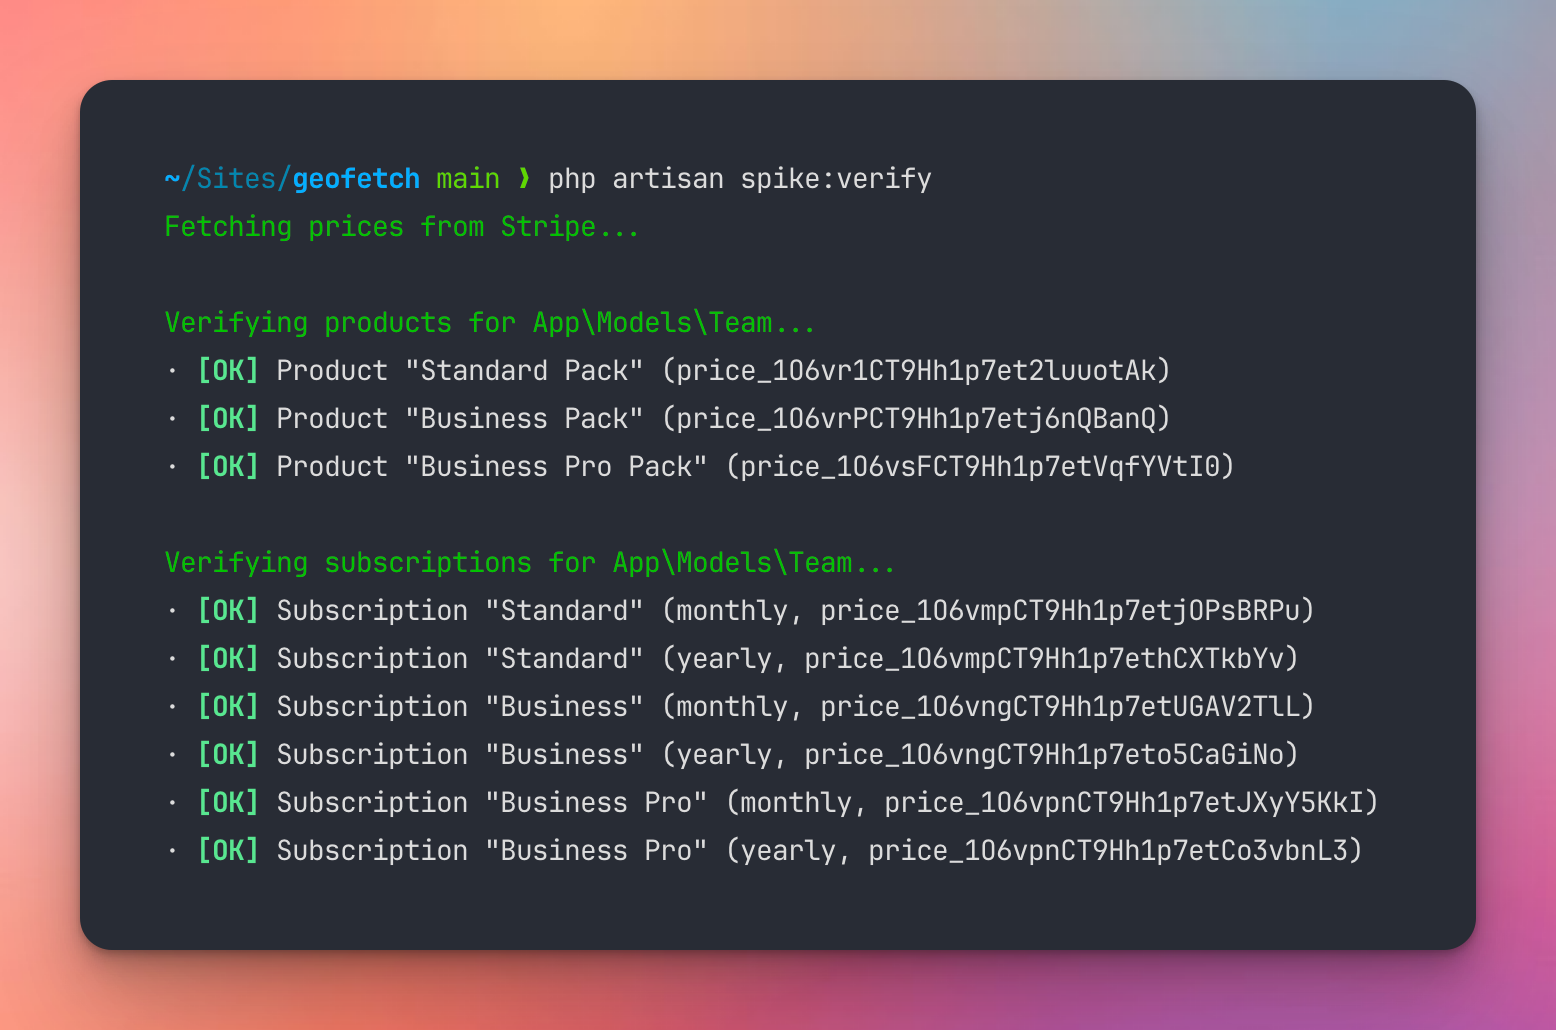
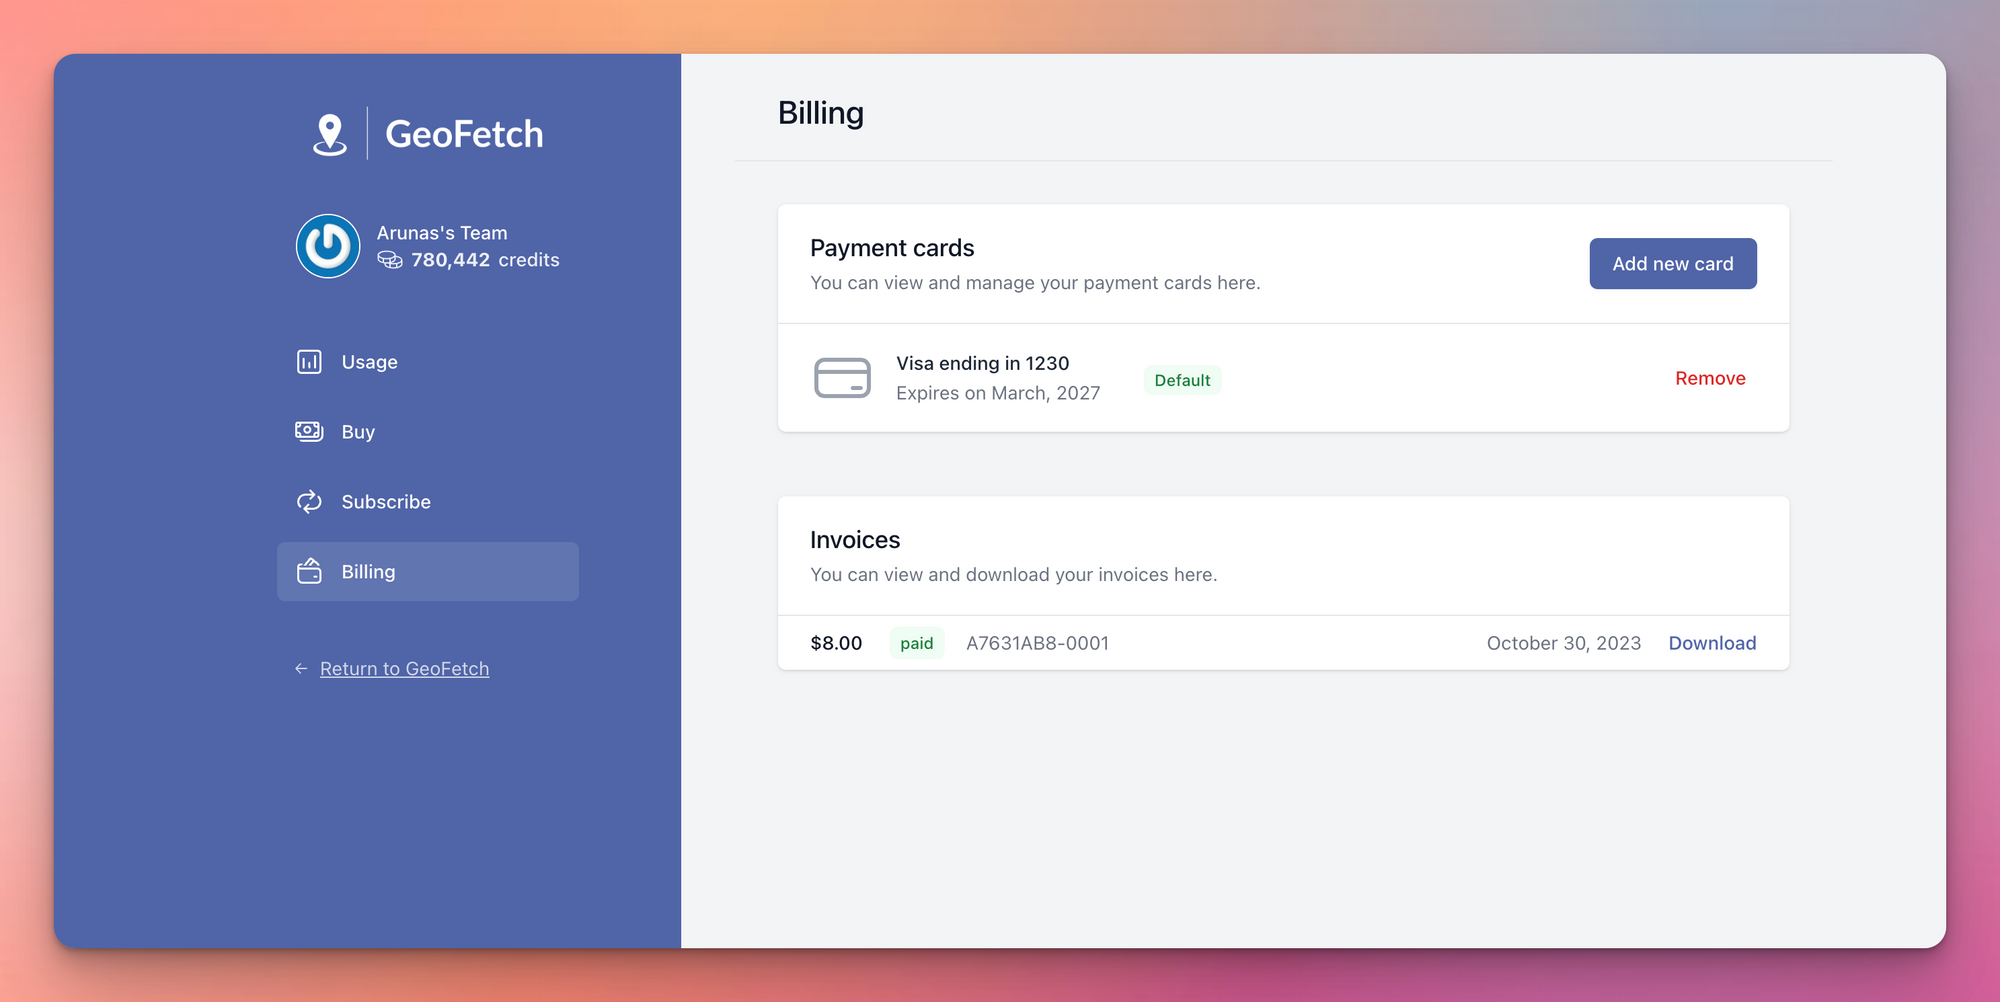
After installing Spike, all we need to do is configure the price plans (subscription, one-off products, or both), and validate the setup with php artisan spike:verify
And here's the fully-featured billing portal that we end up with:
Great! Well that was easy. Let's move to documenting our API.
4. Documentation
As an API, this is a must. Customers need to understand how to consume your API and what results to expect. It’s also good to know how much the API access costs as well. In our case - 1 request = 1 credit.
Again, there are several great tools available to write beautiful documentation for your SaaS. A few notable options are:
- https://readme.so/ - paid
- https://swagger.io/ - free
- Public notion.so pages - free
- https://scramble.dedoc.co/usage/getting-started - free
For our example project, I have chosen Swagger purely because of its common and recognisable user interface, OpenAPI specification, and ability to embed it. This way we can just embed the documentation inside our own app layout instead of having it hosted somewhere else. It’s also free and easy to use!
Here's how I defined the API usage, the parameters, expected responses and so on - all in simple Yaml with their online editor:
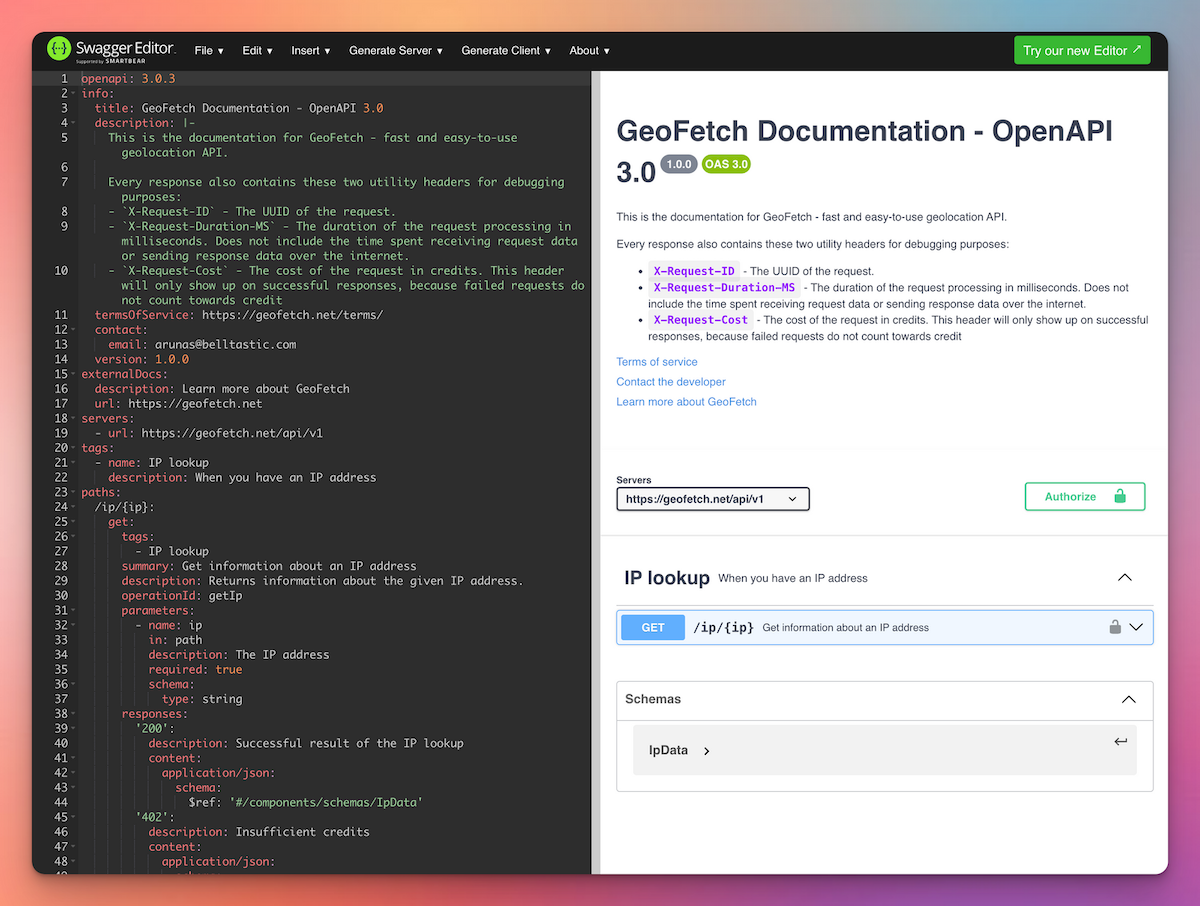
Once you're done defining the API spec, you can export it as JSON, which can be understood by their UI package.
To display the OpenAPI spec, you can use Swagger's open-source UI package - installation instructions here.
In our example project, I have embedded it as part of the app's layout, which makes it more cohesive and still gives customers the ability to navigate to other areas of the SaaS, like so:

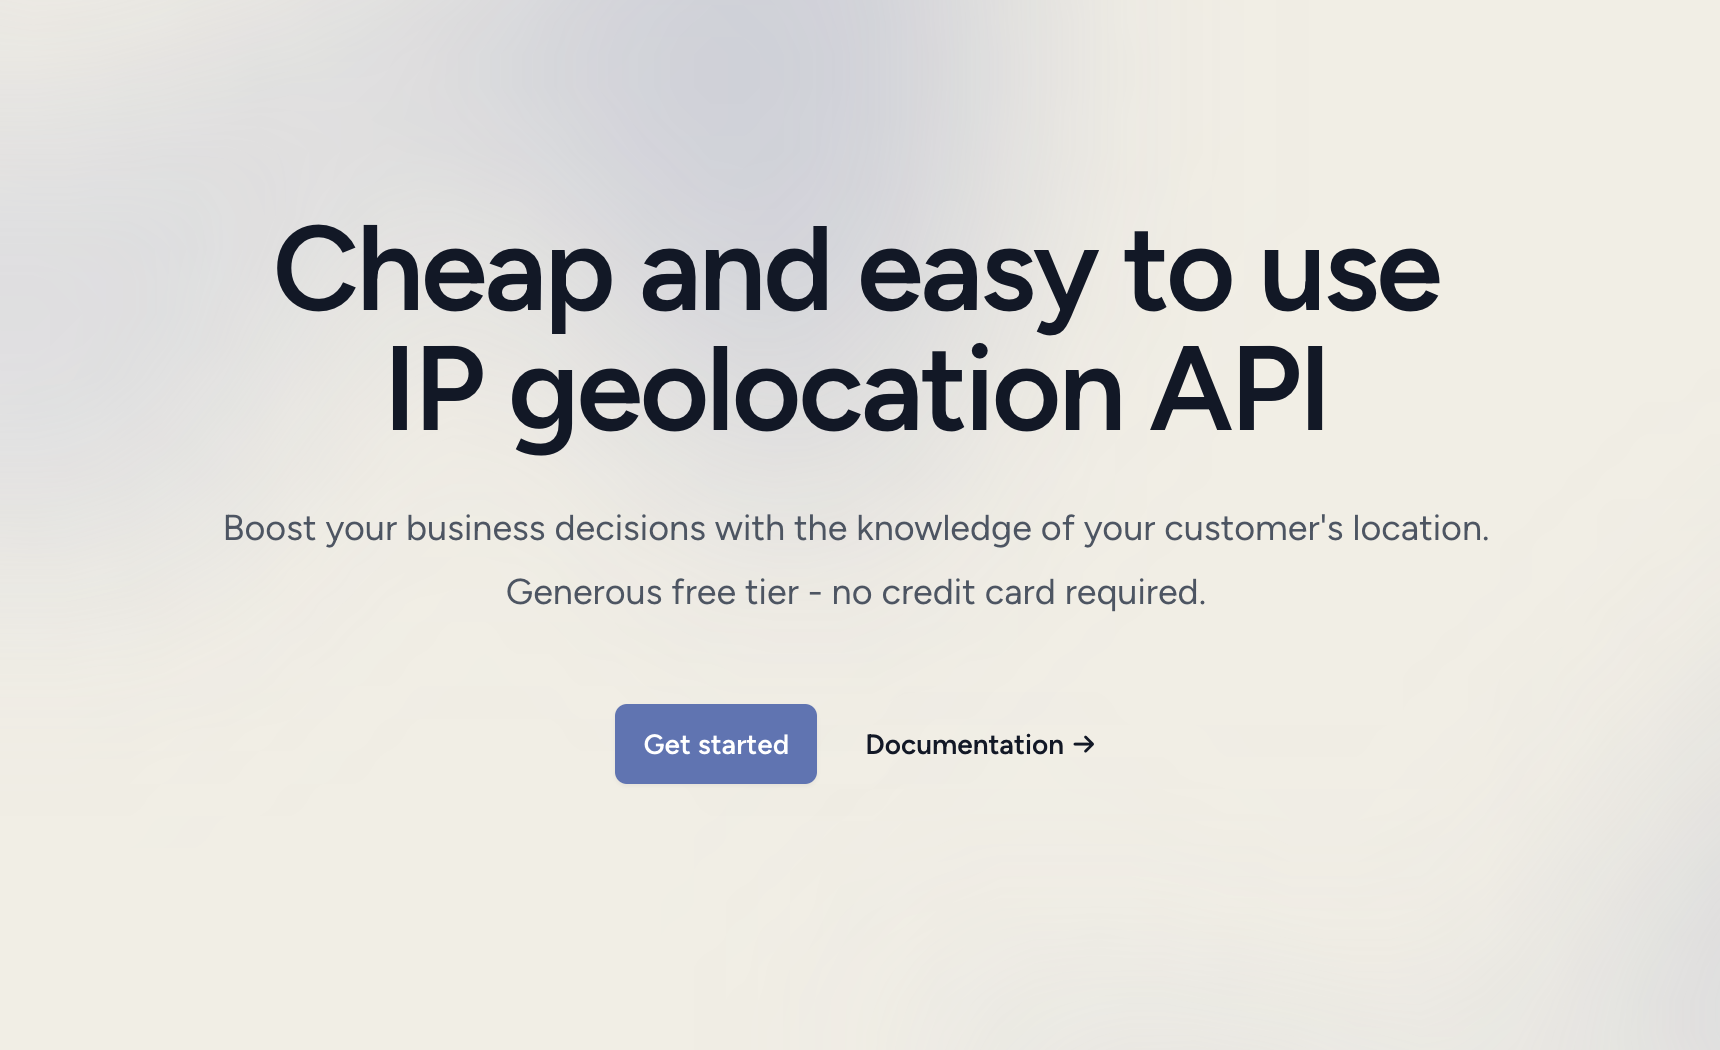
5. Landing page
This is as close as we'll get to marketing in this article. The landing page is the first impression of your product. No doubt you will spend considerable amount of time iterating over your landing page, measuring and improving the conversion rates. Landing pages are an ever-evolving pieces of your app. Regardless, with a low budget of time, it only makes sense to use a template instead of building it from scratch.
Designing the landing page from scratch can also be a huge waste of time! Not only will you spend lots of time that could be better spent working on the features or marketing the product, but you also might not get it to convert as well as some of the pre-made templates or anything done by an expert. For this reason, you should look at some free (or even paid if you can afford it!) landing page templates and just fill them in with your own information.
A few notable examples:
- TailwindUI - paid, but high quality components and templates for both marketing and application UIs based on TailwindCSS
- Untitled UI - paid, but high quality components and templates for both marketing and application UIs in Figma
- Unbounce - High-converting landing page templates
Because our example project uses TailwindCSS already, and I had a license for TailwindUI, we will use that.
- Go to the TailwindUI's landing page examples,
- choose the one you like the most, and copy its code,
- change the text, logos, and colours to fit your brand,
- if you need a logo, check out Adobe Logo Maker
And that’s it! You now have a well-structured and mobile-friendly landing page.
6. Hosting
Last but not least, you need some place for your SaaS to live, to be accessible by everyone. No doubt your chosen framework has lots of options for hosting available, whether it’s serverless, managed VPS, or self-managed VPS.
Aside: When thinking of hosting, it’s easy to get hyped up and starry-eyed when looking at the different hosting offers, processing power, and features. You start thinking of the kind of power you might need in case your product is an "overnight success". The reality is, 99% of the time it's not. Most startups have a slow and predictable growth trajectory which leaves you with plenty of time to upgrade your servers later, if needed. At the same time, you shouldn’t underestimate your framework’s performance - a simple $5 VPS instance could easily serve millions of requests per month. Try to reduce your initial costs as much as possible, until you have proven that there's a need for your product.
Now, back to our project. For Laravel, there are a few well-known offerings for hosting your Laravel application:
- Laravel Vapor - serverless hosting based on AWS. Infinite scale, but more expensive to start with. AWS bill is separate.
- Laravel Forge - easy management of VPS. Connect to your own DigitalOcean, AWS, or Hetzner (affiliate link) account and quickly spin up and manage servers geared towards Laravel. Relatively cheap to start with and maintain, especially if you end up managing several servers.
- Ploi.io (affiliate link) - independent, and fast-growing server management tool. It has great support for Laravel too, and is cheapest of the whole.
You could, of course, manage the VPS servers yourself, things like setting up a new server, installing dependencies, setting up Nginx, MySQL, Redis, setting up scheduled commands, cron jobs, etc. Unless you have experience with all that (and even if you do!), I do not recommend setting up the servers yourself. Use one of the above services to ship faster and with more confidence. Again, this is one of the things that you shouldn’t need to worry about when building your SaaS. Your biggest worry should be the product itself (the business logic, the moat), and marketing/sales.
For this project, I tried out Ploi for the very first time and I was very pleased! It’s a great alternative to Laravel Forge if you’re looking for a change of scene, although both are equally fitted in terms of functionality and reliability.
Here’s what I did:
- In Ploi (affiliate link), I created a new server (used Hetzner (affiliate link) for cheaper EU-based servers). This took a few minutes to prepare the server - all automated, I didn’t need to lift a finger.
- Pointed my domain to the IP of the newly created server.
- Created a new Site in Ploi (affiliate link) with a chosen domain, and connected it to my project’s GitHub repository.
- Clicked “Deploy”
- The site is now live!
- Back to Ploi (affiliate link), click to add an SSL certificate. This takes less than a minute.
- The site is now secured with a free Let's Encrypt certificate!
Now let’s see what other final steps you shouldn't forget before launching the SaaS to the world.
Final steps
You have an app that’s now publicly accessible. What else do you need? Can you sell it already? Can you share it with the world?
There’s a couple of other small steps you should take first before you show it to the world. They don’t take long, so don’t worry!
- Generate a social preview image. This is the image of your website/tool that will show up when shared on any social media website, like X, Facebook, Instagram, Slack, and so on. For a quick win, I usually just take a 16:9 scale screenshot of the landing page. There are better ways to do this, of course, with more of an attention grab, but that’s outside of the article’s scope,
- Generate the embed meta tags. Use an online tool like MetaTags.io to quickly generate the HTML meta tags necessary to display correct information about your website/product when your website URL is embedded somewhere. Place the code inside the
<head>tag of your app’s layout, - Check and update production environment variables:
- Update your Stripe API key to production key,
- Update your Stripe price IDs to production products. If you’re using Spike billing, run the
php artisan spike:verifycommand in production. This will confirm whether you have set up the correct Stripe price IDs, - Other variables like your app's domain, name, mail configuration, etc.
And just like that, the SaaS that you built in a weekend is now live and ready to take orders. Congratulations!
Here's the final product:

Conclusion
As you can see, it doesn’t take much to build a software product that you can sell to others. It can even be put into step-by-step instructions! If it’s so easy, why isn’t every software developer rich already? Because simply building the product is not enough. This article covers only the simplest, basic building blocks of the software that have been automated because every business needs that.
Ultimately, the success of your product will come down to:
- Features - the problem you're solving, how useful it is to your consumers (building an IP geolocation API can be a bad idea, because the market is already overcrowded with geolocation APIs),
- Marketing - share your solution with the world, help customers solve their problems with either yours or a different product. If no one finds out about your great product, then no one will buy it.
The entry barrier for building software products has dropped dramatically over the last decade. So how do you set yourself apart? Learn marketing. Learn how to sell your product, or team up with someone who knows.
If you’re looking to learn more about marketing of your product, I suggest looking no further than Rob Walling and his podcast “Startups for the rest of us”. Pick up his latest book (not sponsored, I just really liked it!) and you’ll have a good introduction to what to expect from running a software business.
Hope you liked this article, and I’d really appreciate it if you shared it with your friends!