Nuxt.js with an Express.js API server running on Now.sh


Nuxt.js, Express.js and Now.sh are some of the most exciting web technologies available today. Now.sh being relatively young (as of 2019) with the new version 2.0 come major improvements and design changes. Their documentation makes it super easy to start with projects where you're only using a single framework, but it can be tricky to configure a monorepo (consisting of both front-end and the back-end) that's not only deployment-friendly, but also local-development-friendly. After all, A fast and easy-to-use development environment has great impact on your total productivity.
In this article I'll walk you over my set up of a Nuxt.js app (for your client-facing application using Vue.js), Express.js backend for your website's API (you'll find yourself reaching out to backend solutions sooner or later), and a Now.sh configuration for easy deployment and local development of the serverless monolith! Let's begin.
Just FYI - you can find the full boilerplate for Nuxt.js + Express.js + Now.sh (followed by this article) in this GitHub repository. Just clone it and you're good to go!
Creating a Nuxt.js app
Let's build the whole skeleton with this one easy-to-use command. Do feel free to select whichever preferences you like during the setup of Nuxt.js. You can read more about the available options here. For the sake of this article, here are the options I have chosen:

npx create-nuxt-app monorepo
cd monorepo
Creating an Express.js API
First, we'll need the express package to be installed:
npm install --save express
# or:
# yarn install express
First, let's talk about the folder structure we'll have for the Express.js API. In order to leverage the most out of Now.sh's serverless infrastructure, every route should (in most cases) live in its own Javascript file. This way your routes will have only the dependencies they need (instead of the whole Express.js app with all of the middleware and plugins being loaded on every single route). This will reduce your serverless costs while also making your requests faster! Let's look at an example folder structure:
api
⌞ app.js          // your main Express.js server creation/initialization
⌞ routes
  ⌞ index.js      // -> /api
  ⌞ movies
    ⌞ index.js    // -> /api/movies
  ⌞ hello
    ⌞ index.js    // -> /api/hello
⌞ middleware      // all of your middleware definitions will live here

pages             // Nuxt-specific pages
plugins
...
Now that we have the Nuxt.js app, we will respect its folder structure and will instead create a new folder dedicated to the Express.js backend API. Let's call it api and create an app.js file inside it:
mkdir api
cd api
touch app.js
Let's create an Express.js app! You're notice we're not starting the Express.js server here. There's no need for that, because Now.sh take care of that on both production deployments and local development.
// api/app.js

const app = require('express')()

module.exports = app
To help us get started and provide us later with some working API routes, let's create some:
// api/routes/index.js

const app = require('../app')

app.get('/api', (req, res) => {
    res.status(200).send({
        message: 'Hello world!'
    })
})

module.exports = app
// api/routes/hello/index.js

const app = require('../../app')

app.get('/api/hello', (req, res) => {
    res.status(200).send({
        message: `What's your name?`
    })
})

app.get('/api/hello/:name', (req, res) => {
    res.status(200).send({
        message: `Hello, ${req.params.name}`
    })
})

module.exports = app
Great! We've got a couple of API routes here to play with, so how do we start a local development server and see if it works?
Deploying the Express.js API to Now
It's time we start setting up Now.sh. If you don't have an account with Now yet, go ahead and create one. Zeit.co are the developers of Now.sh (and many other great open-source tools) and provide the platform for your serverless deployments. Worry not, it has a generous free-usage tier so you will not have to pay anything to get started!
Now let's create a now.json configuration file at the root of our project for Now.sh to understand how to deploy your app.
{
    "version": 2,
    "builds": [
        {
            "src": "api/routes/**/*.js",
            "use": "@now/node"
        }
    ],
    "routes": [
        { "src": "/api/hello(.*)", "dest": "api/routes/hello" },
        { "src": "/api/(.*)", "dest": "api/routes/$1" },
        { "src": "/api", "dest": "api/routes/index.js" }
    ]
}
Let me explain the above configuration:
"version": 2specifies which of the Now.sh versions to use. Currently, Now 2.0 is the latest version."builds": []lets us define how to build our app. It will take all the files that match the glob pattern"api/routes/**/*.js"and use their open source@now/nodebuilder to compile it into serverless lambdas."routes": []is where we define our API routes. Because our Express.js API will be split into multiple lambdas independent from each other, there's no central place to let our app know how to route the requests. It will now be handled by Now.sh. You're free to use PECL patterns to match URLs in the"src"attribute and redirect them to the appropriate route handlers in the"dest"attribute.
Next, you'll need the now CLI. Let's install it globally:
npm install -g now
The first time you run a Now deployment, it will ask you to login from the terminal. Let's try and deploy what we've got so far!
now
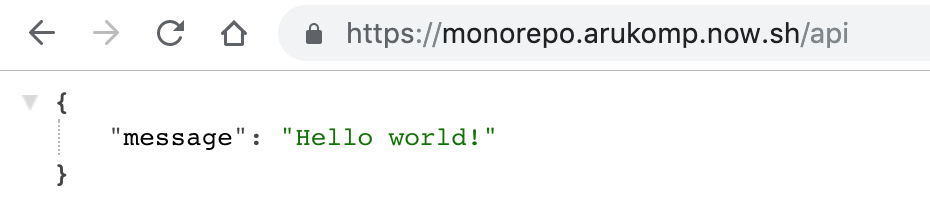
Give it a minute and you will see the deployed URL at the end. Now visit the <deployment-url>/api in your browser and you'll see our "Hello world!" message.
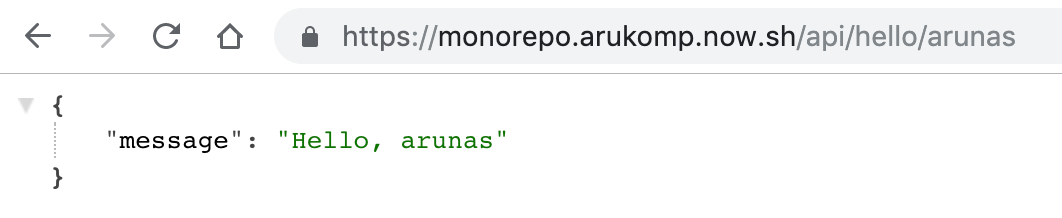
For the other URL we've configured, visit <deployment-url>/api/hello/<your-name> to make sure the routing is working as it should.
Perfect! Our API is live, hosted in the cloud as serverless functions! Isn't that cool? If you're not yet aware of the massive benefits of serverless, have a read here on the advantages and disadvantages of going serverless.
Moving on...
Deploying the Nuxt.js app to Now
Configuring the Express.js app to be deployed to Now seemed easy enough. What happens when you need to deploy multiple frameworks under the same domain with a single Now configuration? Now makes it easy with their multi-build configuration. Here's how.
Let's update our now.json file with the code below:
{
    "version": 2,
    "builds": [
        {
            "src": "api/routes/**/*.js",
            "use": "@now/node"
        },
        {
            "src": "package.json",
            "use": "@now/static-build"
        }
    ],
    "build": {
        "env": {
            "API_URL": "https://monorepo.arukomp.now.sh"
        }
    },
    "routes": [
        { "src": "/api/hello(.*)", "dest": "api/routes/hello" },
        { "src": "/api/(.*)", "dest": "api/routes/$1" },
        { "src": "/api", "dest": "api/routes/index.js" },
        { "src": "/_nuxt/.+", "headers": { "cache-control": "s-maxage=31536000" } },
        { "src": "/(.*)", "dest": "$1" }
    ]
}
Keep in mind, the order of the route definition is important! When matching the user's requested URL, Now.sh will go from top to bottom and go with the first matching URL handler. You don't want Nuxt.js to handle your API routes, which is why they're at the top. If the user is requesting anything but /api* - it will fall back to the last route, which is Nuxt, which is capable of handling dynamic routes on its own.
You'll notice there's a new attribute "build": {"env": {}} - Now.sh will pass these as environment variables during the build process. Nuxt.js will need that to determine how to route the Axios calls. Make sure to change it to your <deployment-url> you got from the previous Now deployment (Now.sh deployment URLs don't change).
To deploy Nuxt.js apps, we'll need to also define an NPM script in our package.json file. Now.sh will use it to build the Nuxt.js app and make it serverless-ready.
    "scripts": {
        ...
        "now-build": "nuxt generate"
    }
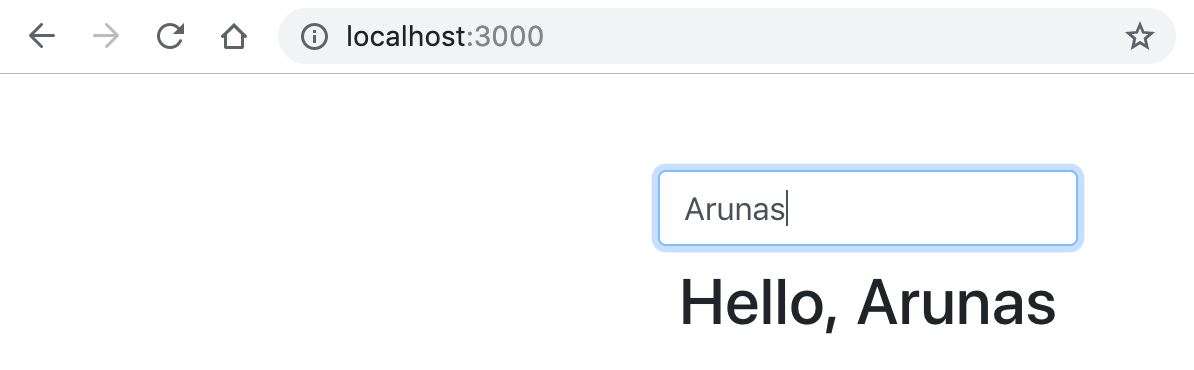
To make things more interesting, let's hook up our Nuxt.js app with our API backend. It will display a simple input box for your name, and once updated - it will fetch a greeting from the backend API we configured previously.
Update the default pages/index.vue Nuxt page (remove the default <style> tag as it will mess up with our layout):
<template>
  <section class="container mt-5">
    <div class="row">
      <div class="col-4 offset-4">
        <div>
          <input type="text" class="form-control" v-model="name" @input="onNameInput" placeholder="What's your name?" />
        </div>
        <h2 class="text-center mt-2">
          {{ greeting }}
        </h2>
      </div>
    </div>
  </section>
</template>

<script>
export default {
  data() {
    return {
      name: '',
      greeting: '',
    }
  },

  methods: {
    onNameInput() {
      this.$axios.$get(`/api/hello/${this.name}`).then(response => {
        this.greeting = response.message;
      })
    }
  }
}
</script>
Let's deploy it again!
now
Once ready, go to the deployment URL you see in the terminal after Now has deployed the app.

If you check your browser developer tools and look at the Networking tab when you type, you'll notice it's communicating with the backend API successfully!
Congratulations, you now have a fully configured monorepo with Nuxt.js (front-end), Express.js (back-end) and serverless deployment with Now.sh!
(Bonus) Step further: making it local-development-friendly
Now.sh includes an option to run a local deployment to simulate the serverless environment on your machine, thanks to the new now dev CLI command.
Unfortunately, it's still in early development and there's a few "gotchas" with multiple-build setup which can make the local development experience not so smooth. The Nuxt.js's HMR (Hot Module Reloading) will not work as expected and result in a sub-optimal experience.
Here's my take on it, which follows on the set up we've created so far in this article. The goal here is to separate Nuxt.js build from the API build (only locally), and then run them simultaneously with the help of the concurrently package.
First, let's update our package.json file to include the extra scripts needed to make this work:
  "scripts": {
    "dev-api": "NODE_ENV=dev now dev --port 3001",
    "dev-nuxt": "API_URL=http://localhost:3001 nuxt",
    "dev": "concurrently \"npm:dev-api\" \"npm:dev-nuxt\"",
    "build": "nuxt build",
    "start": "nuxt start",
    "generate": "nuxt generate",
    "now-build": "if test \"$NODE_ENV\" != \"dev\" ; then nuxt generate ; fi"
  },
Let's recap what we've done here:
"dev-api"script will start the Now.sh local development on port 3001, while also setting theNODE_ENVenvironment variable to "dev""dev-nuxt"script will start the Nuxt.js local development build with HMR, while also setting theAPI_URLvariable to that of the API endpoint (to match the different port we've defined in the previous script)"now-build"script will now test for theNODE_ENVvariable. If we're running this locally, it will be set to "dev" and will therefore ignore thenuxt generatecommand. Remember, we're starting up Nuxt.js separately, so there's no need for Now.sh to rebuild it locally- Finally,
"dev"command will run bothdev-apianddev-nuxtscripts simultaneously, in effect starting two dev servers (API endpoint at port 3001 and Nuxt.js at port 3000)
Now that we have set up our NPM scripts, all we're left to do now is to install the concurrently package:
npm install concurrently --save-dev
# or
# yarn install concurrently --dev
That's it! From now on, instead of using now dev to run a local server, you just need to run the good old dev NPM script:
npm run dev
You can now visit http://localhost:3000 straight away and your Nuxt.js + Express.js app will be ready to use immediately with fully-working HMR and automatic rebuilds on the API endpoint changes.
You can still deploy the app to Now.sh with the simple now command just like before, but now you'll have a much better local development experience!
Hope this helped. I welcome all and any feedback on this article!